
Pharmacist View
Section Purpose:
This documentation describes the pharmacist view – a specialized tool intended for pharmacists with appropriate permissions. It allows prescription verification, creating production orders, and managing bags.
Basic Information
Section titled “Basic Information”The pharmacist view is available exclusively to users with appropriate permissions in the organizational structure. It enables:
- Verification of prescriptions before acceptance
- Creating and managing bags
- Viewing detailed information about ingredients and nutritional values
- Printing labels and orders for production
View Content
Section titled “View Content”The pharmacist view contains three main tabs:
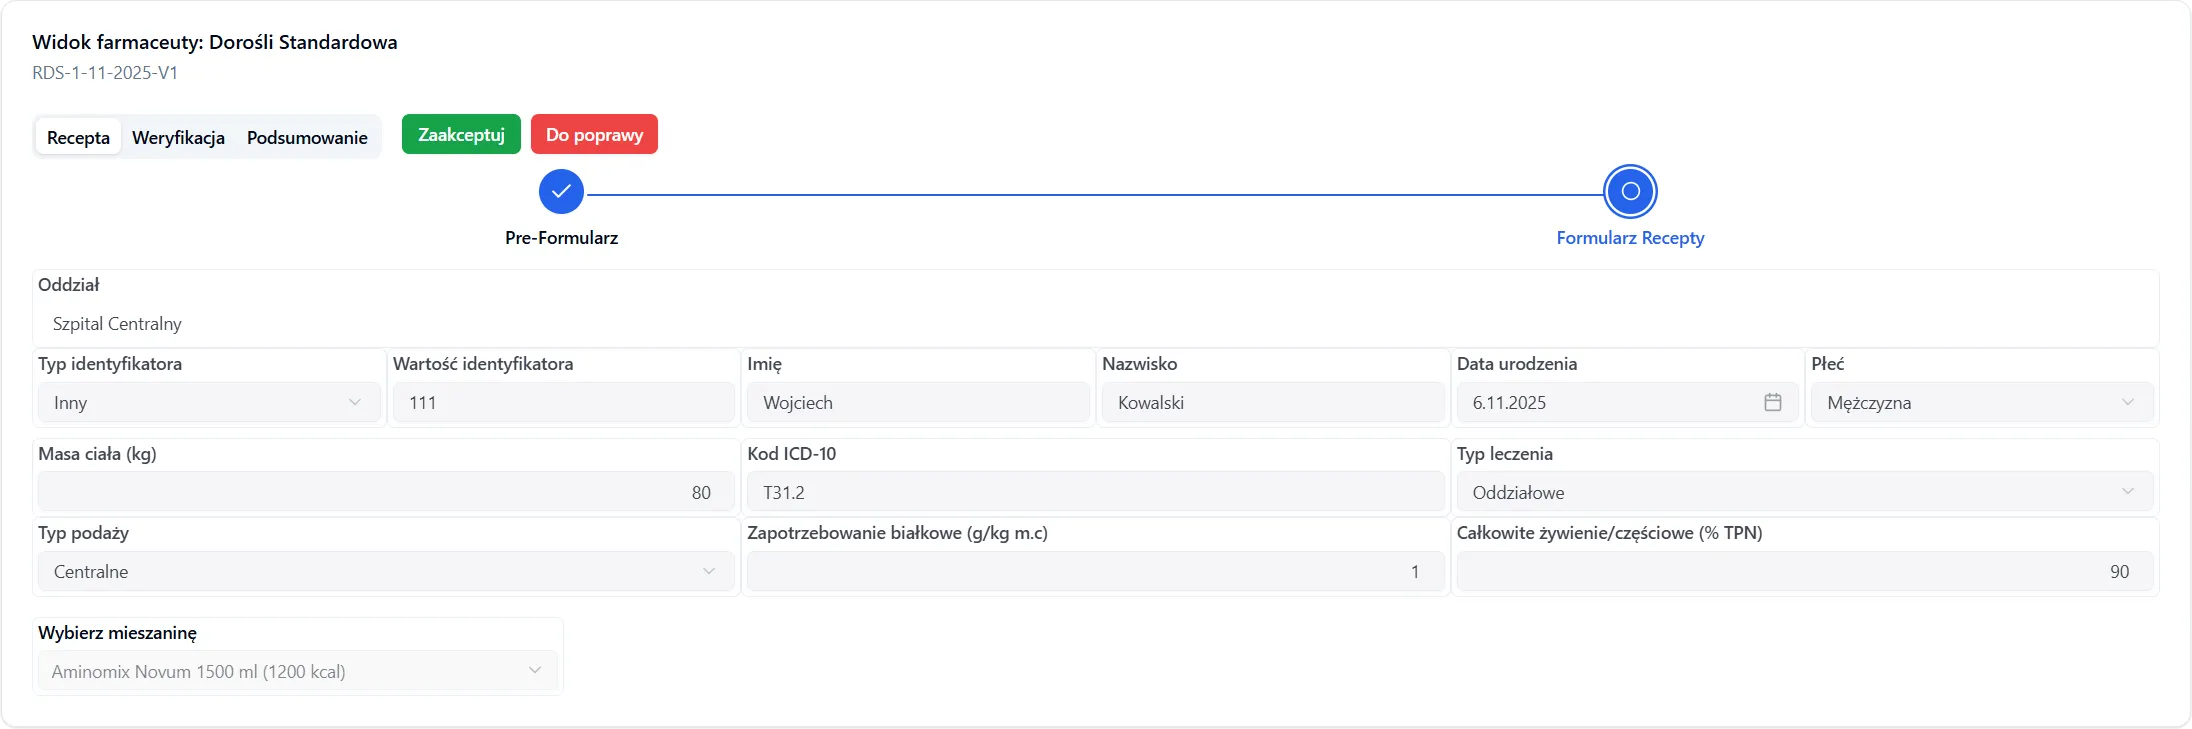
1. Prescription
Section titled “1. Prescription”Displays the standard prescription form of the given type
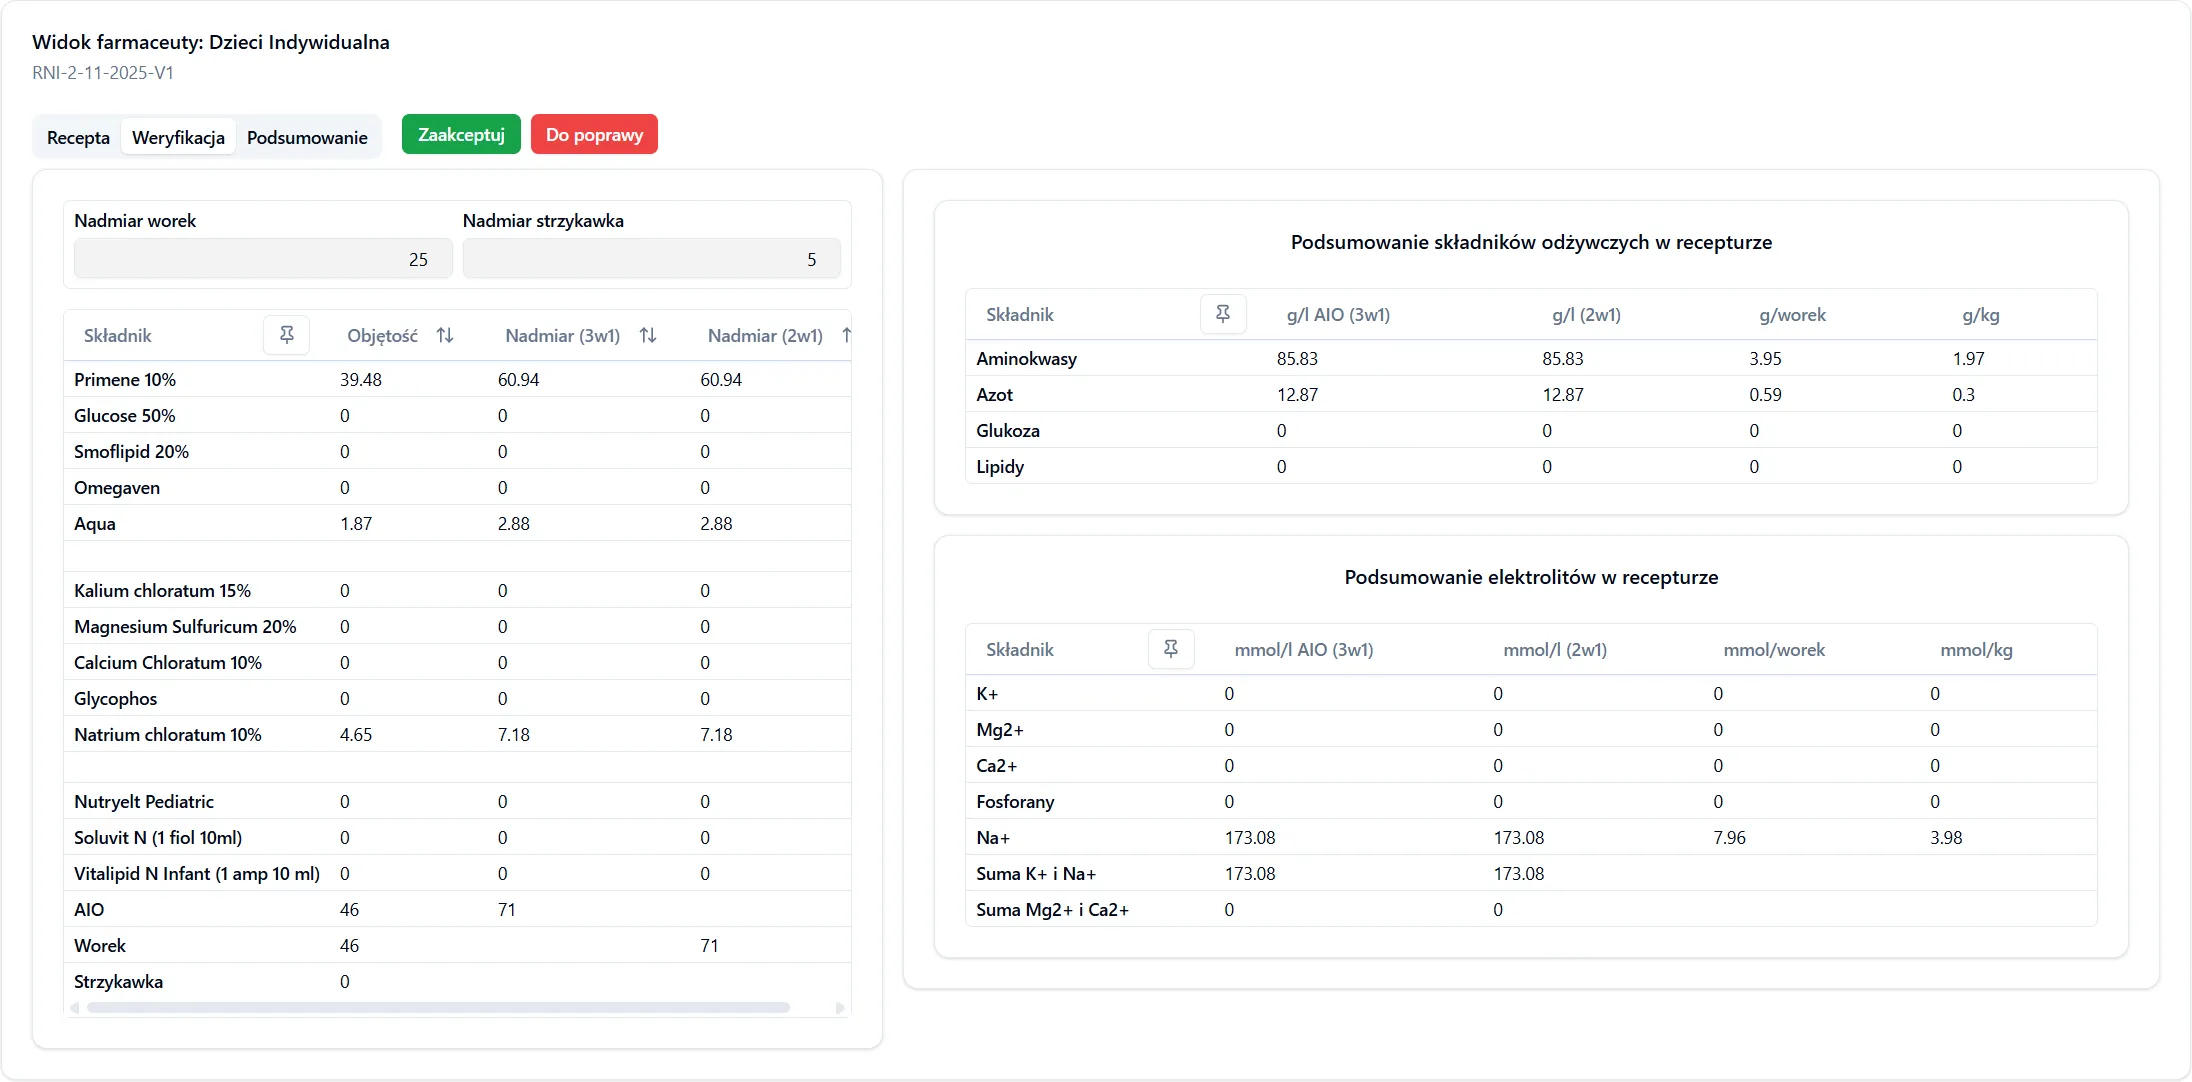
2. Verification
Section titled “2. Verification”The verification tab enables detailed formula control. It contains:
-
Overages – ability to set volume overages
-
Ingredient List – overview of all ingredients with their quantities
-
Nutritional Summary – compilation of nutritional values in the formula:
-
Electrolyte Summary – overview of electrolytes in the composition
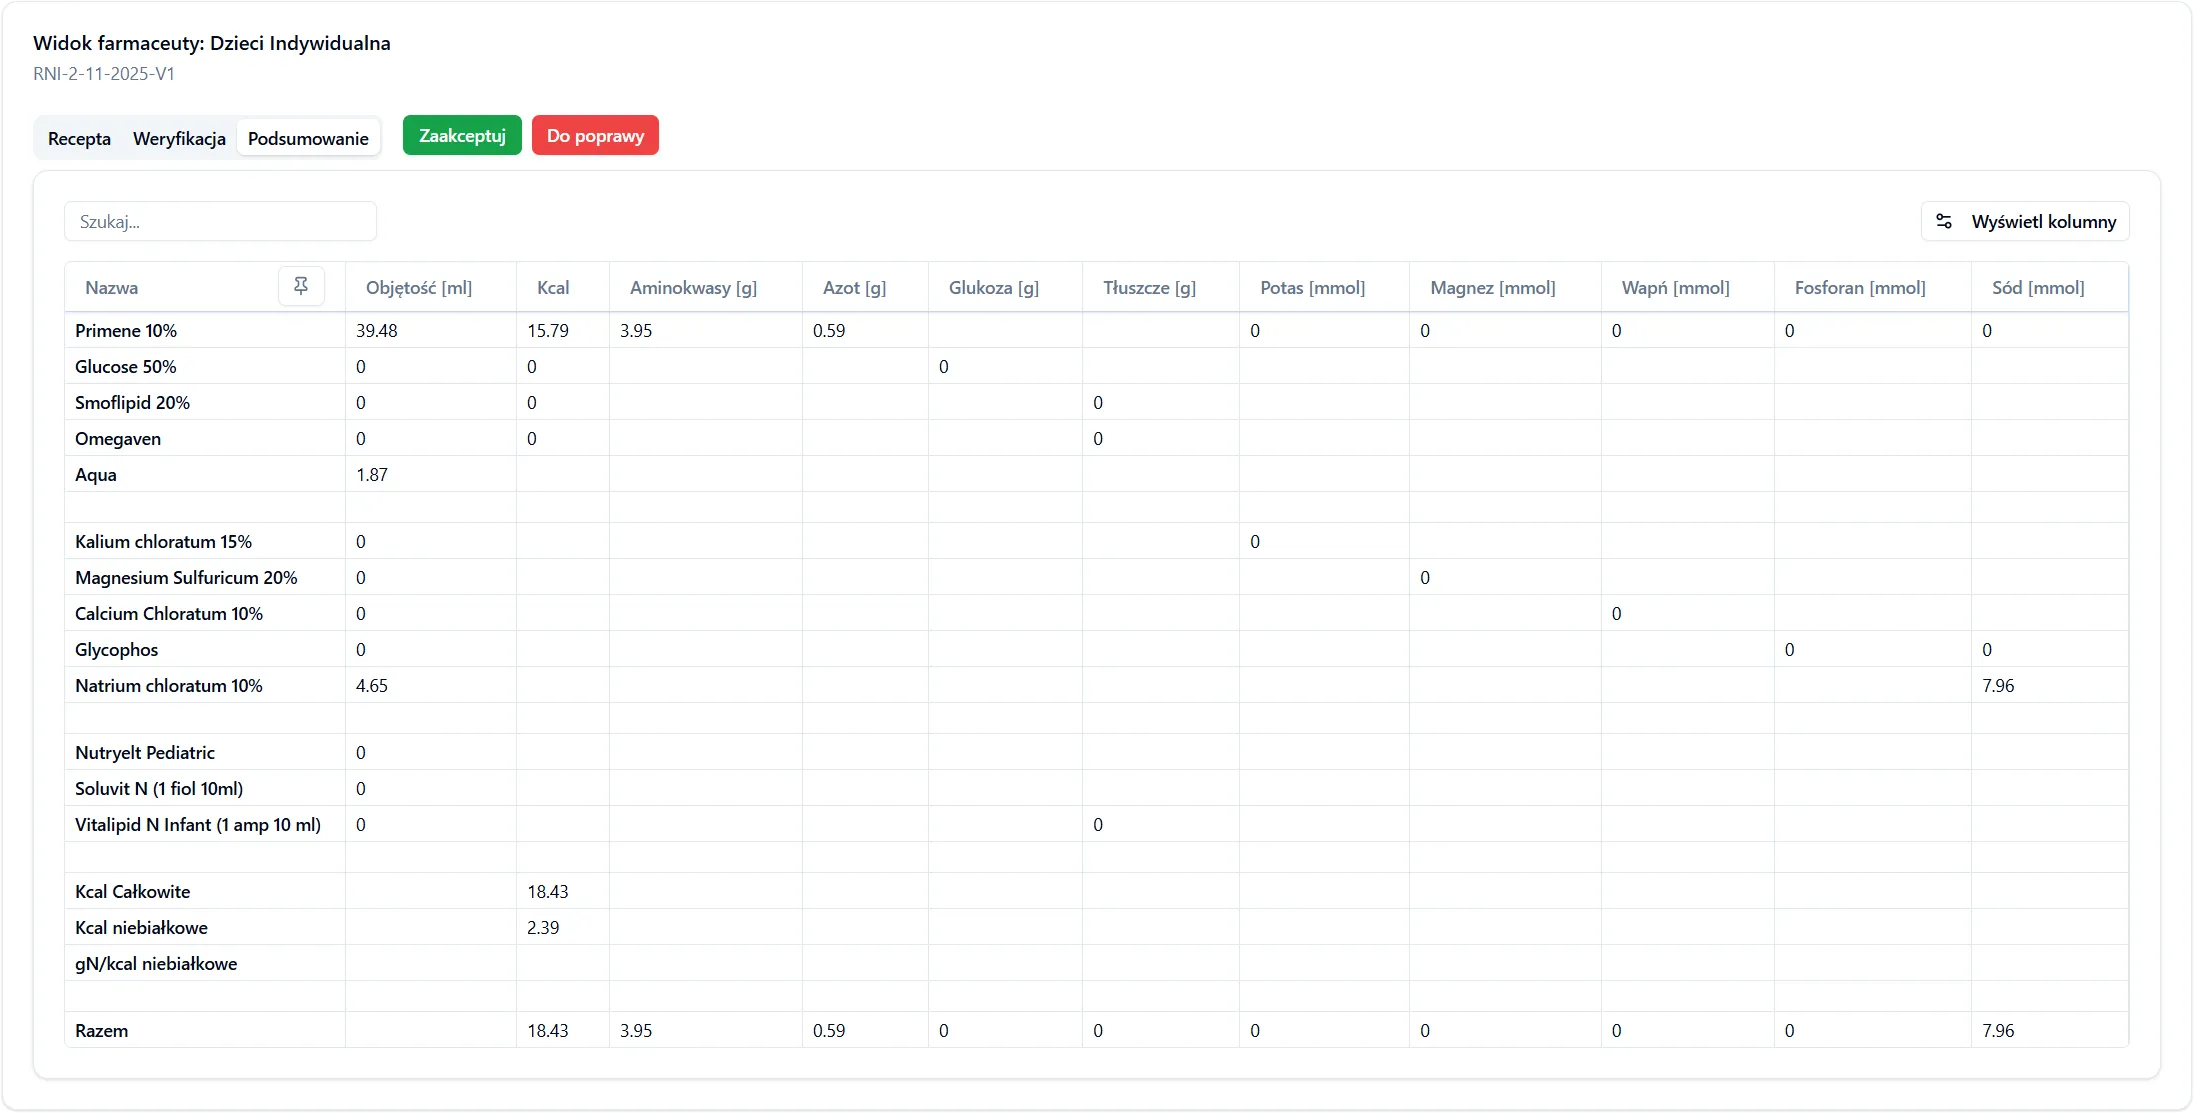
3. Summary
Section titled “3. Summary”The summary view displays a complete formula compilation:
- Content of each ingredient (e.g., Primene 10%)
- Number of calories (kcal)
- Ingredient volume
- Etc.
Workflow
Section titled “Workflow”First Access – Accepting or Rejecting Prescription
Section titled “First Access – Accepting or Rejecting Prescription”Upon first entry to the pharmacist view for a given prescription, two options are available:
1. Reject prescription – prescription changes to status “Needs Correction”. The physician can then make corrections and resend the prescription.
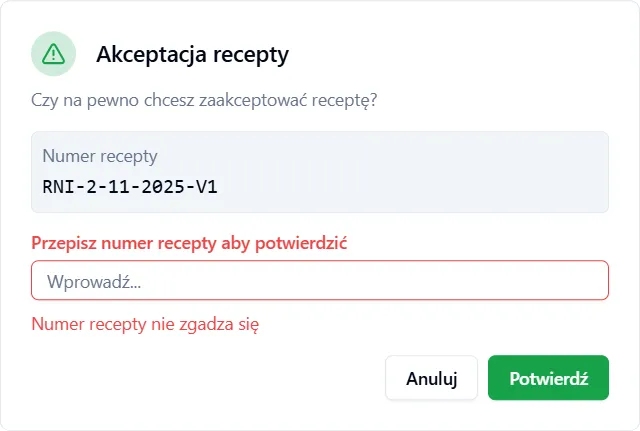
2. Accept prescription – opens the “Accept Prescription” dialog.
Add Bag Dialog
Section titled “Add Bag Dialog”After accepting the prescription, a bag adding form will appear, where you need to fill in:
-
Bag Type Required
- 3-in-1 Bag
- 2-in-1 Bag
-
Preparation Date Required – formula preparation date
-
Days of Validity Required – how long the bag will be valid
-
Number of Bags Required – number of bags being prepared
-
Note Optional – additional information about the bag
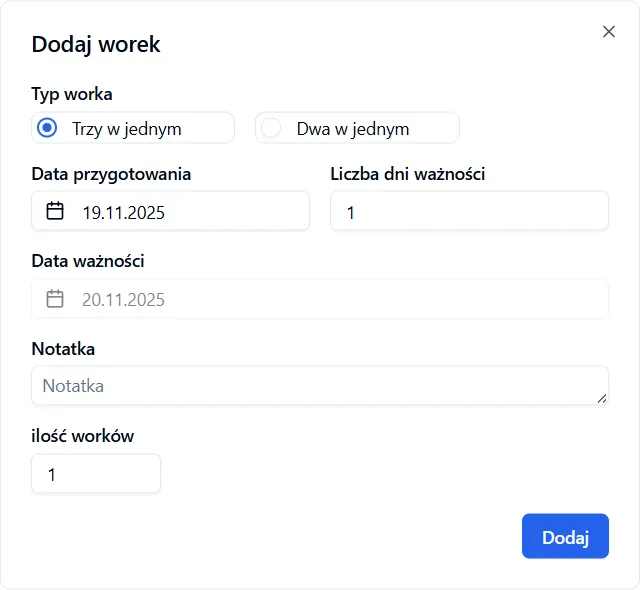
After filling in the form, click the “Add bag” button.
Print Service and Printer Selection Dialog
Section titled “Print Service and Printer Selection Dialog”After confirming bag data, another dialog will appear to select:
- Print Service – selection of available print service
- Printer – selection of printer that the chosen service has
After selecting the printer and confirming:
- Prescription changes to status “Accepted”
- A bag is added to production
- Label and order are sent for printing
Subsequent Accesses – Existing Bags
Section titled “Subsequent Accesses – Existing Bags”When you enter the pharmacist view for a prescription that already has bags, a “Select Bag” dialog will appear with a list of existing bags for this prescription.
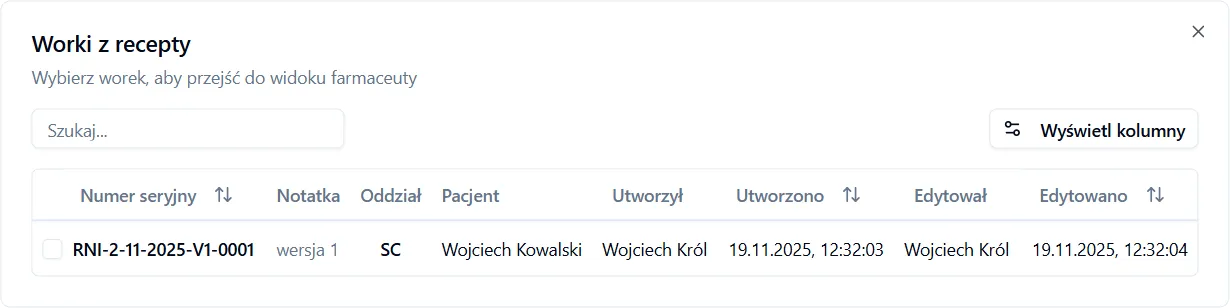
After selecting a bag you can:
- View its details
- Make changes (if required)
- Click the “Add bag” button to add another bag (without re-accepting the prescription)
Frequently Asked Questions
Section titled “Frequently Asked Questions”What happens if I reject a prescription?
The prescription will change to status “Needs Correction” and return to the physician who dispensed it. The physician can then make necessary corrections and resend it.
How many bags can I add for one prescription?
You can add as many bags as needed. Each bag is printed and sent to production separately.
Do I have to select a printer immediately after adding a bag?
Yes – printing labels and order is a condition for accepting the prescription. You must select a print service and printer for the process to be completed. However, if an error occurs and printers are not available, it’s enough to select only the print service.